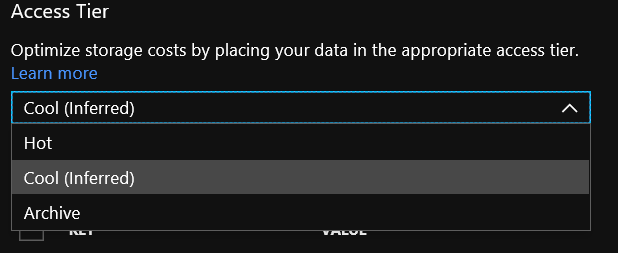
As we all know Azure Storage provides a reliable and highly available object storage to store massive amounts of data for a very cheap price. Blob access tiers is a functionality provided by Azure Storage to store your blobs in different access tiers based on how these blobs are accessed.
Currently there are three access tiers in which you can store the blobs:
- 1. Hot
- 2. Cool
- 3. Archive
Archive Storage consist of two major changes:
1. It introduces a new pricing tier for cheap long-term/non-frequently accessed Blobs names Archive Storage Tier
2. As Archive Storage Tier is (currently) only available for individual blobs it enables tier selection on Blob level for the old existing tiers (Cold & Hot) also. It effectively enables a mix of hot, cold and archive Blobs within the same Blob storage account.
When you create your storage account you still have to decide a tier between Hot Access Tier or Cool Access Tier. This cannot be set to Archive Tier yet.
The access tier you select in the wizard will be the default tier (Hot/Cool) which can be overridden by individual blobs later.
When you upload some files, they will be assigned to the default tier.

You can now go in and alter the Blob Access Tier properties (though code or portal). In the portal you can select a blob and change its tier.

The issue here is we cannot convert entire blob items/contents to Archive Tier, we have to change it individually file to Archive Tier.
I have been searching for this solution for quite a while to convert entire blob to Archive Tier and we can do this using PowerShell Script.
Resolution:
Prerequisite: Please install Azure module and allow running script
Install-Module -Name AzureRM
Set-ExecutionPolicy -ExecutionPolicy RemoteSigned
Import-Module AzureRM
Script:
$StgAcc = “storageaccountname”
$StgKey = “aksdnakjdhfasdjkfhnakdhfadkhfaklsdfhalkdf==”
$Container = “storageblobname”
$ctx = New-AzureStorageContext -StorageAccountName $StgAcc -StorageAccountKey $StgKey
Connect-AzureRmAccount
#Get all the blobs in container
$blob = Get-AzureStorageBlob -Container $Container -Context $ctx
#Set tier of all the blobs to Archive
$blob.icloudblob.setstandardblobtier(“Archive”)
Screenshot after running:

Work around:
Here is the official guide for changing tiers on portal.
https://docs.microsoft.com/en-us/azure/storage/blobs/storage-blob-storage-tiers#quickstart-scenarios
Change the tier of a blob in a GPv2 or Blob storage account.
- 1. Sign in to the Azure portal.
- 2. To navigate to your blob in your storage account, select All Resources, select your storage account, select your container, and then select your blob.
- 3. In the Blob properties blade, click the Access tier dropdown menu to select the Hot, Cool, or Archive storage tier.
- 4. Click Save at the top of the blade.
Related Posts:
Backup Synology NAS to Azure Cool Storage:
Data is not only the core of any business but also a significant asset for all users. Important files -like critical work documents or personal photos- deserve a great backup strategy…..
Adding Email Alias to Office 365 when using Azure AD Connect:
So we have an on-premise AD running, this is connected to my Office 365 (and therefore Azure AD) using the Azure AD Connect
If this article helped you or if you have further suggestions, please feel free to comment below.

Great text! Very helpful! But I had a problem using it because blobs that I need converting are having special characters (ex. “LISÄKANSI”) How can I change the command to use UTF-8 encoding?
Thanks !!!!!!!!!!